Go to page: 1 | 2
In this step by step proces wee’ll be showing how to correct most common digital photography problems.
First we have to evaluate whether an image needs a color correction or adjustment
Our Color Correction Procedure consists of two steps : selection and color correction
For better results use another selection
for each part (hairs , skin , eyes ) of the picture.
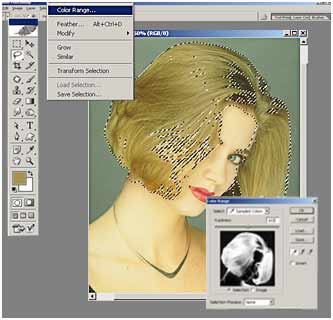
- Use the Lasso Tool (L) to select hair and eyebrows areas
- To refine an existing selection, use the Color Range command to select a subset of colors. Image -> Adjustment -> Color Range
- Choose the select color eyedropper, and then click in hair area to select a color range.
- To expand the selection and include similar colors, drag the Fuzziness slider (Fuzziness 103 )
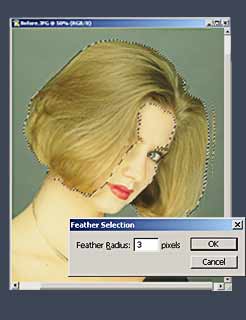
- Use Feather Selection (Alt+Ctrl+D) to soften your adjustment area and make it more natural
- Create layer from selected (Cntl-J)
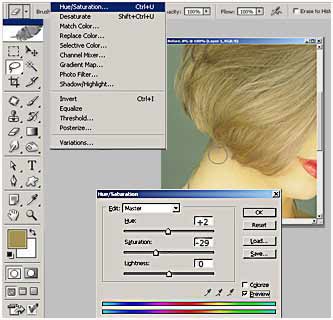
- Correct color Image ->Adjustment -> Hue/Saturation ( Ctrl + J)
Edit : " Master"
Hue :
- 2
Saturation : -
29
Lightness :
0
***************************************************************************************
Go to page: 1 | 2
©2000-2014 Digital Art Gallery