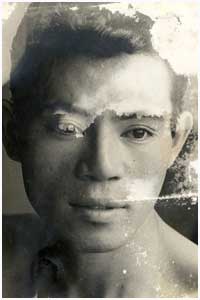
In this tutorial we're going to show how to restore heavily damaged photograph with missing parts.
This process consists of the four steps :
- Remove light spots;
- Remove dust and scratches from the image;
- Fix the missing part ( Eye and hair );
- Adding sepia tone .
Remove light spots

- Convert a color image into a black and
white one ;
Image > Adjust > Desaturate
- Use the Lasso tool
to select light spots on the forehead, cheek and ear;
- Soften the edge of a selection using
the Feather command
Feather Radius = 3 px
- Apply the Curves (Ctrl + M ) to make selected areas more bit darkly;
************************************************************************************
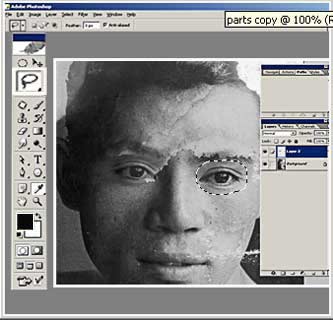
- Select the undamaged eye by Using:
- Use Feather
Selection (Alt+Ctrl+D) to soften your
adjustment area and make it more natural;
- Create layer from selected (Cntl-J):
- Move the layer to the "lost "eye
area;
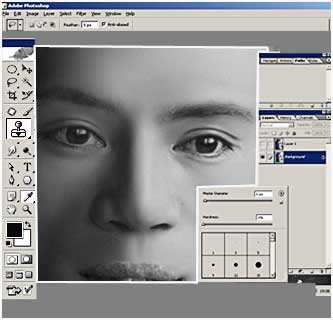
- Adjust the color balance by
Curves (Ctrl + M )
- Merge the layers together
Merge Selected > Layers Palette
The goal of this step is removing dust and scratches and obtain an absolute portrait likeness with the original image.
This is the most complicated part of the photo restoration . It requires skill , experience and a clear understanding of task.
" Plastic faces " are the end result of a mistake
There are many ways to adjust.We usually use Clone Stamp and Brush Tool
![]()
Go to page: 1 | 2